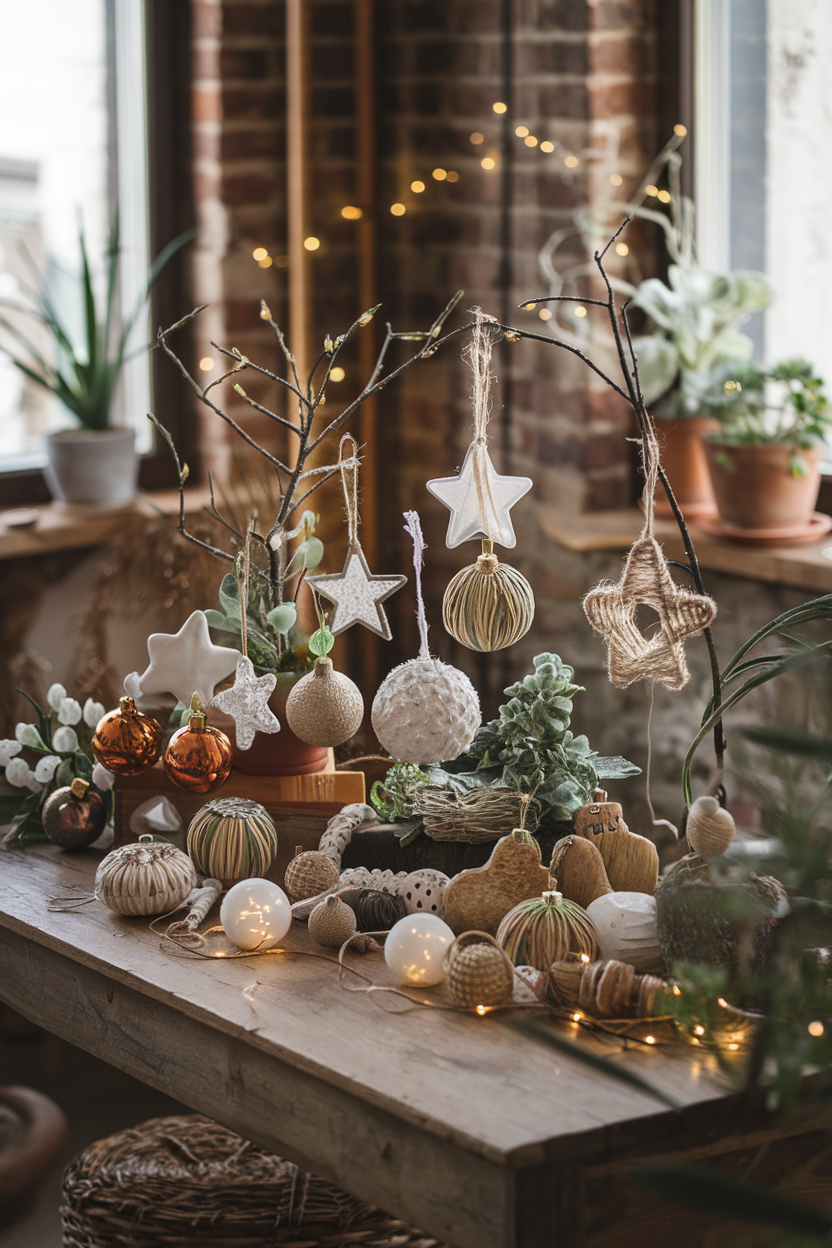
As the holiday season comes near, we all feel the excitement and want to make our homes cozy and festive. But, what if you could make your own ornaments without spending a lot of money? In this article, we’ll show you nine easy and affordable DIY projects. They turn common household items into beautiful Christmas decorations.
Last year, my neighbor Sarah had a DIY ornament-making party. I was amazed by her creativity, making ornaments from unexpected things like buttons, twine, and a light bulb. It made me see that the holiday spirit is about making something special with our own hands, not just buying it.
Let’s explore how to make holiday decorations from everyday items. We can make magical snow globes from mason jars or rustic pine cone decorations. There are so many ways to add warmth and personal style to your home. Join me on this fun journey to discover the joy of making your own Christmas decorations.
Transform Everyday Items into Festive Holiday Decor
Why not get creative and turn everyday items into special holiday decorations? Upcycling items into unique ornaments adds a personal touch to your home. It also helps reduce waste and supports sustainability.
Benefits of Creating Handmade Ornaments
Making your own ornaments has many benefits. It lets you show off your artistic side and think outside the box. Plus, it’s a fun activity that brings people together. Your handmade ornaments will be cherished by your loved ones for years.
Essential Tools and Materials
- Variety of crafting supplies, such as scissors, glue, paints, and markers
- Everyday items like glass jars, pinecones, paper rolls, and fabric scraps
- Decorative elements like ribbons, beads, and twine
- Sealants or varnishes to protect your creations
Safety Considerations for DIY Projects
When upcycling, safety comes first. Wear gloves and safety glasses with sharp tools or dangerous materials. Make sure your workspace is bright and well-ventilated. Keep small parts away from kids. With some care, crafting can be fun and safe.
Ready to unleash your creativity and turn household items into festive decor? Whether you’re experienced or new to crafting, the joy of making something unique and eco-friendly will make your holiday season unforgettable.
Magical Mason Jar Snow Globes
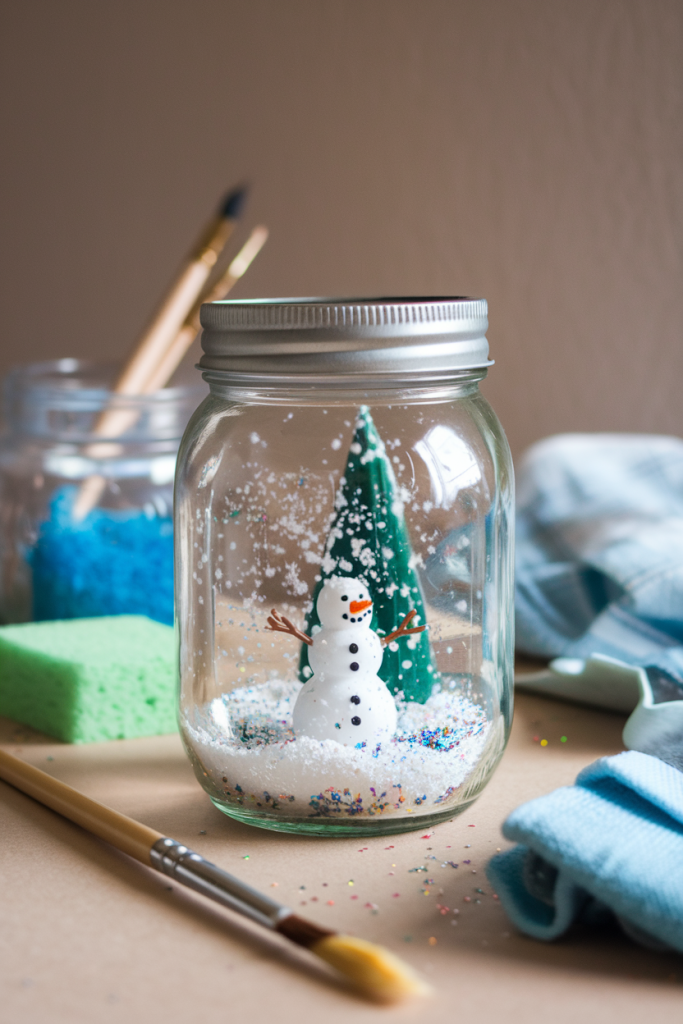
Making waterless snow globes with mason jars is fun and adds whimsy to your holiday decor. These miniature Christmas scenes in jars are not just decorations. They also make great DIY gifts for your loved ones.
To make your own snow globe, pick a clear glass mason jar with a strong lid. Choose a small figurine or holiday item to be the centerpiece of your jar craft. Place the figurine in the jar, making sure it’s centered and won’t move.
- Add a bit of artificial snow or glitter to the jar. Swirl it around the figurine for a wintry look.
- Fill the jar with distilled water, leaving a little room at the top for expansion when you close the lid.
- Close the lid tightly and turn the jar over to see your creation.
These waterless snow globes can be customized in many ways. Try different figurines, like woodland creatures or holiday scenes, to match your style and holiday theme.
| Supplies Needed | Personalization Ideas |
|---|---|
|
|
With a bit of creativity and basic supplies, you can make waterless snow globes. They will amaze and delight your family and friends during the holidays.
Rustic Pine Cone Ornaments with Twine
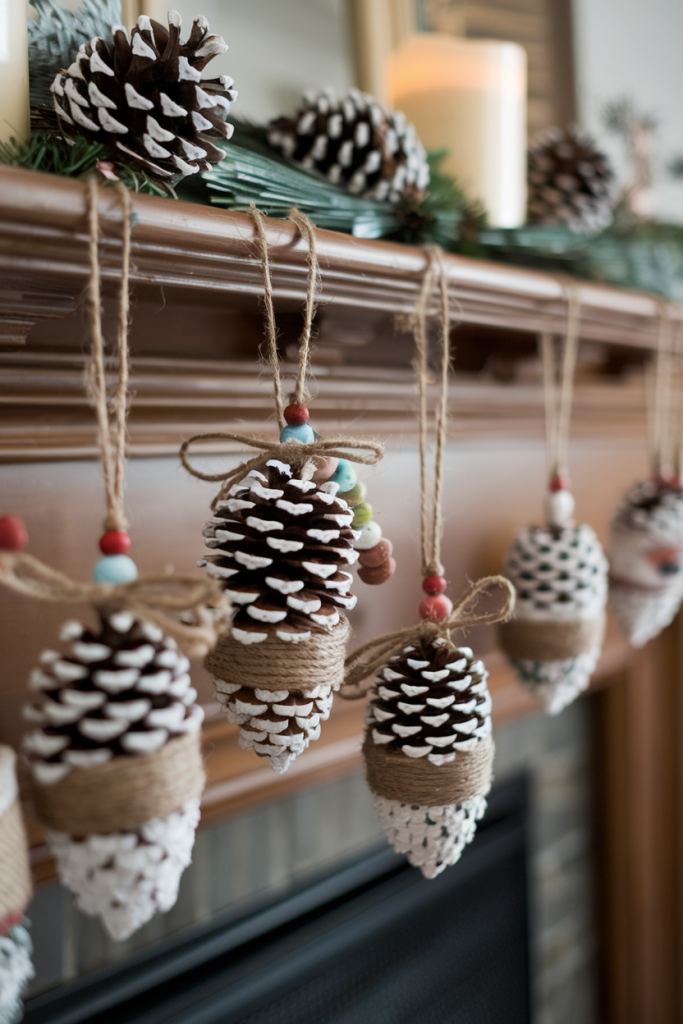
Turn a simple pine cone into a beautiful, rustic Christmas ornament. With just a few steps, you can make stunning natural Christmas decorations. These will bring a woodland charm to your holiday decor. Let’s explore the fun of making woodland ornaments with pine cone crafts.
Pine Cone Preparation Tips
Start by getting your pine cones ready. Look for them in your backyard or a nearby park. Make sure they’re clean and dry before you start. A soft-bristled brush can help remove dirt or leaves.
Decoration Variations and Themes
These natural Christmas decorations are very versatile. You can try different decoration methods to match your holiday style. Add metallic paint, glitter, or small decorations like bows or beads to make them unique.
Weather-Proofing Methods
To keep your woodland ornaments looking good for years, protect them from the weather. Use a clear sealant or varnish. This will keep them safe from moisture and other outdoor elements.
Making these pine cone crafts is a great way to add natural beauty to your holiday decor. With a bit of creativity and simple materials, you can turn pine cones into beautiful woodland ornaments. They’ll bring warmth and character to your home. Let nature’s rustic charm shine through your natural Christmas decorations.
DIY Christmas Ornaments from Paper Rolls

Making festive ornaments can be simple and affordable. You can turn everyday items like cardboard toilet paper and paper towel rolls into cute, kid-friendly Christmas decorations. These toilet paper roll crafts and cardboard tube ornaments are not only cheap but also a fun way to involve kids in the holiday fun.
These DIY Christmas ornaments from paper rolls are very versatile. You can make many designs, like snowflakes, stars, or tiny Christmas trees, all with the same basic materials. Plus, kids can help, making it a fun activity for the whole family.
- Begin by gathering your toilet paper roll or cardboard tube materials. Use different sizes and colors for a more interesting look.
- Try cutting, shaping, and decorating the tubes to make your ornament designs. Use paint, glitter, ribbons, and more to make each one special.
- After your kid-friendly Christmas crafts are done, hang them on your tree or around your home for a festive look.
These cardboard tube ornaments are a budget-friendly way to decorate and a great chance to bond with your kids. So, get your materials ready and start making holiday crafts!
Vintage Button and String Art Decorations
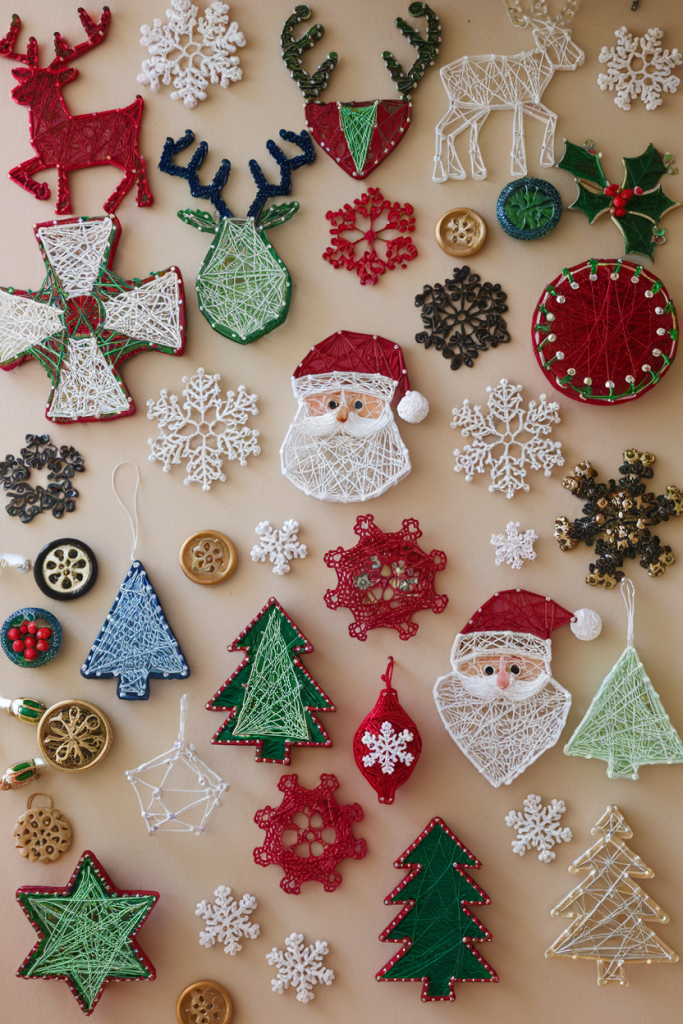
This holiday season, bring back the charm of the past with button crafts and string art ornaments. They add a nostalgic touch to your retro Christmas decor. These timeless techniques turn everyday items into eye-catching decorations that will be treasured for years.
Color Scheme Selection
When making your button crafts and string art ornaments, pick colors that feel cozy and vintage. Classic red and green, or silver and gold, are great choices. For something different, try navy and mustard, or emerald and blush.
Pattern Design Ideas
Get creative with string art patterns and button arrangements. Try geometric shapes like triangles or hexagons for bold designs. Or go for organic shapes like swirls or wreaths to capture the season’s natural beauty. Mix different techniques to make your retro Christmas decor truly unique.
Whether you’re experienced or new to crafting, these button crafts and string art ornaments are fun and rewarding. They let you add a personal touch to your holiday decor. So, grab your supplies, let your creativity shine, and enjoy making your celebrations special.
Upcycled Light Bulb Angels

Turning old light bulbs into angel ornaments is a fun way to breathe new life into old items. These light bulb crafts add a magical touch to your holiday decor. They also let you express your creativity and make the most of your angel ornaments.
Before starting, make sure to wear protective eyewear and handle the bulbs carefully. This is important to avoid any accidents. After you’ve taken these steps, you can start having fun!
Choose the light bulbs you want to use. Pick different sizes and shapes to make your display interesting. Clean the bulbs gently and let them dry before painting.
- Get your painting supplies ready, including acrylic paints in various colors. Try out different color combinations to make your recycled Christmas decorations stand out.
- Paint the light bulbs to turn them into angel bodies. Add details like faces, robes, and halos to make them come alive.
- After the paint dries, add embellishments like glitter, ribbons, or small accessories. This will make your angel ornaments even more special.
Display your handcrafted light bulb angels on your Christmas tree or around your home. Their whimsical charm will add joy to your holiday celebrations.
“The true meaning of life is to plant trees, under whose shade you do not expect to sit.” – Nelson Henderson
These light bulb crafts not only make your holiday decor unique but also remind us to appreciate the simple joys of creating. Enjoy making your own light bulb angels. Let their glow spread cheer throughout your home.
Natural Orange Slice Garlands

Make your holiday decor pop with natural orange slice garlands. They bring rustic charm and a lovely citrus scent to your home. This DIY project is easy and makes any space feel cozy and festive.
Drying Techniques
To make your own garlands, start by cutting fresh oranges into thin rounds. Place the slices in a single layer on a baking sheet or dehydrator trays, making sure they don’t overlap. You can air-dry them or use a low-heat oven or dehydrator to speed up the drying.
Air-drying takes 3-5 days, while oven or dehydrator drying can take 6-8 hours. Keep an eye on them, turning them now and then, until they’re dry and crisp.
Preservation Methods
- After drying, string the orange slices together with a needle and thread or fishing line to make garlands.
- Lightly spray the slices with clear acrylic sealant to keep their color and scent bright. This helps preserve their natural oils and prevents fading.
- Add other natural elements like cinnamon sticks, pine cones, or dried flowers to your garlands. Mixing dried fruit decorations, citrus garlands, and aromatic Christmas ornaments makes a beautiful and fragrant display.
Using nature’s beauty, you can create dried fruit decorations that enhance your holiday decor and fill your home with a lovely scent. Enjoy the simplicity and charm of citrus garlands and the delightful aroma of these aromatic Christmas ornaments.
Fabric Scrap Christmas Stars
Turn your fabric scraps into charming Christmas star ornaments. These festive decorations add a personal touch to your holiday decor. They are perfect for upcycling and showcasing your creativity.
Making these textile ornaments is a great way to reuse your scrap fabric projects. With a few simple steps, you can create stunning, quilted star decorations. They reflect your unique style and creativity.
Getting Started with Fabric Star Ornaments
Start by collecting fabric scraps in different colors, patterns, and textures. Cotton, flannel, and velvet are great for a cozy look. Sort your fabrics by size and color to make designing easier.
- Cut out star shapes from your fabric scraps, varying the sizes for visual interest.
- Arrange the star pieces in a pleasing composition, overlapping the points to create dimension.
- Stitch the layers together using a needle and thread or a sewing machine, securing each point in place.
- Add a loop of twine or ribbon to the back for hanging your ornament.
The beauty of these textile ornaments is their unique character. Embrace imperfections and let the natural textures of your scrap fabric projects shine. Try different color palettes, fabric combinations, and stitching patterns. This way, you can create a collection of quilted star decorations that truly reflects your personal style.
Coffee Pod Wreath Baubles
Get creative and breathe new life into used coffee capsules! Turn them into beautiful, metallic ornaments that will make your holiday wreath shine. We’ll show you how to clean, prepare, and paint your coffee pod crafts. This way, you can make upcycled Christmas balls that sparkle with a modern look.
Cleaning and Preparation Steps
First, clean and prepare the coffee pods for crafting. Start by removing any coffee grounds or residue. Rinse the pods under warm water and let them dry completely. After drying, use rubbing alcohol to clean the surface. This makes it ready for painting.
Painting Techniques
Now, your coffee pods are ready for painting. Use metallic paint in gold, silver, or copper for a shiny finish. Apply thin coats, letting each dry before adding more. Try different painting methods like brushing or dripping for cool textures.
After painting, add embellishments like ribbons or glitter. Make a wreath with your painted pods using hot glue or wire. Hang it to add a metallic touch to your holiday decor.
With a bit of imagination and basic supplies, you can make unique Christmas balls from used coffee pods. Let your creativity flow with these coffee capsule crafts!
Salt Dough Memory Ornaments

Make your holiday decorations special with homemade clay ornaments. These can be keepsake decorations. Making personalized Christmas crafts with salt dough is fun for the whole family. You can create ornaments with handprints, pet paws, or messages.
To make your own salt dough ornaments, you’ll need just a few simple ingredients:
- 2 cups all-purpose flour
- 1 cup salt
- 1 cup water
- Rolling pin
- Cookie cutters or other shapes
- Drinking straw or toothpick
- Acrylic paint (optional)
- Varnish or sealant (optional)
First, mix the flour and salt in a large bowl. Slowly add the water and knead until it’s smooth. Roll it out to 1/4-inch thickness. Use cookie cutters or your hands to shape the ornaments. Press in handprints, pet paws, or messages with a straw or toothpick.
After shaping your homemade clay ornaments, place them on a parchment-lined baking sheet. Bake at 200°F for 1-2 hours until hard. Let them cool, then decorate with paint, glitter, or other embellishments. Finish with a clear varnish or sealant to protect your keepsake decorations for years.
Crafting personalized Christmas crafts with salt dough is a great way to make lasting memories. Invite family and friends to join in. Together, you can create unique ornaments that will be cherished for many seasons.
Creative Storage Solutions for Handmade Ornaments
Keeping your handmade ornaments safe is key to enjoying them for years. The right storage methods protect these delicate items. They help keep them looking great for generations.
From clever boxing and wrapping to controlling temperature, there are many ways to keep your ornaments safe. Let’s explore some creative ideas to preserve your holiday treasures.
Boxing and Wrapping Methods
Packing your DIY ornaments with care is important. Choose strong storage boxes or containers to avoid damage. Wrap each ornament in acid-free tissue paper or breathable fabric for extra protection.
Be sure to label the boxes with what’s inside and when you packed them. This makes it easy to find and organize your ornaments. Use dividers or compartments to keep them from getting scratched.
Temperature Control Tips
Keeping the right temperature and humidity is vital for your ornaments. Store them in a cool, dry spot, away from sunlight or heat. Basements or attics with changing temperatures and moisture are not good places.
Use a dehumidifier or desiccant packets to control the environment. This helps keep your ornaments in perfect condition.

